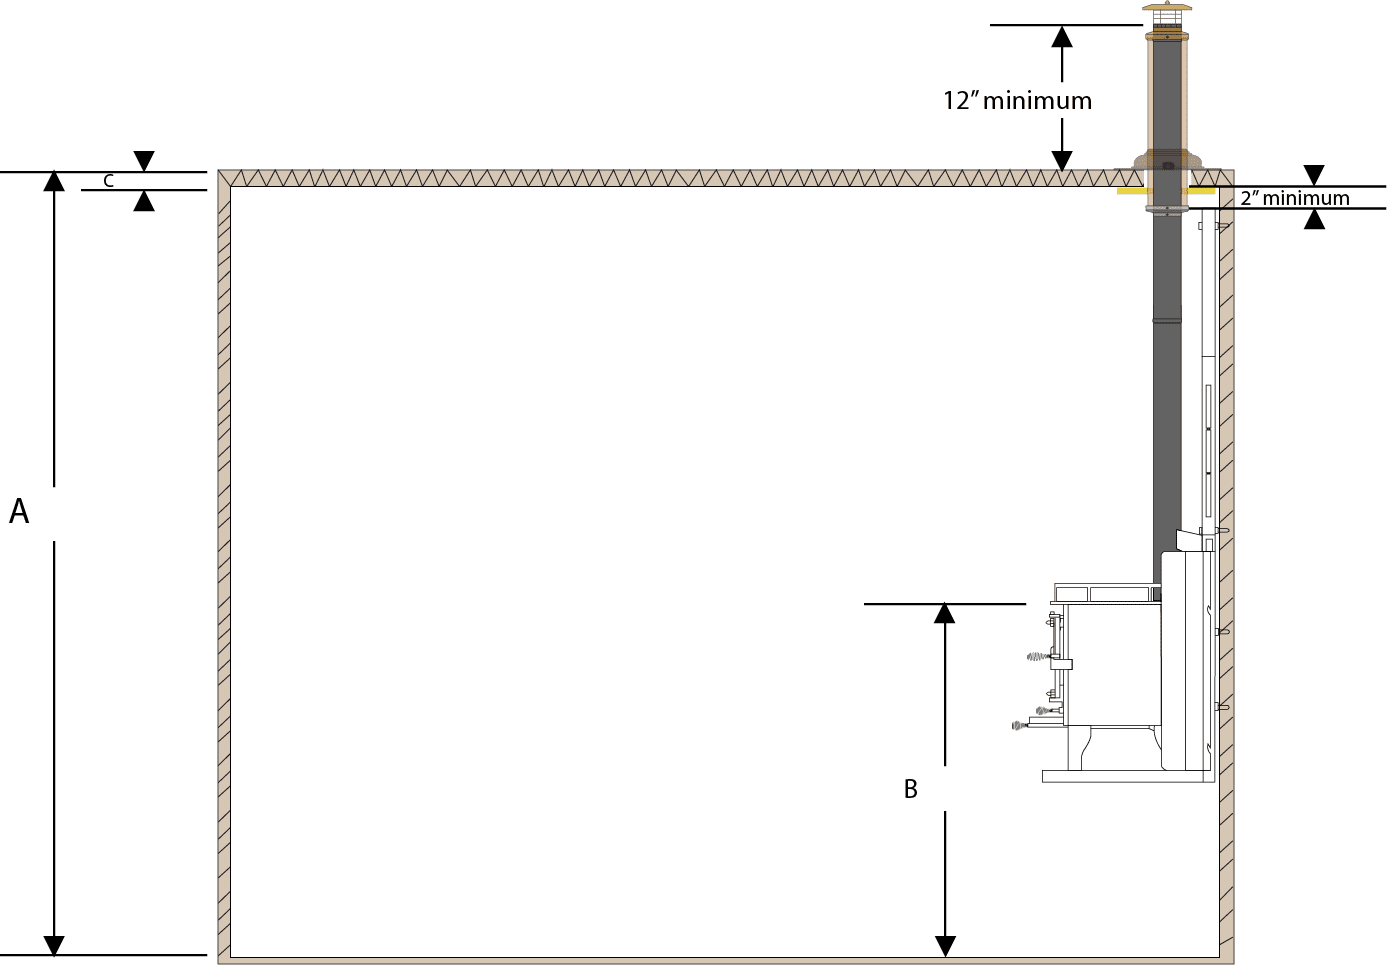
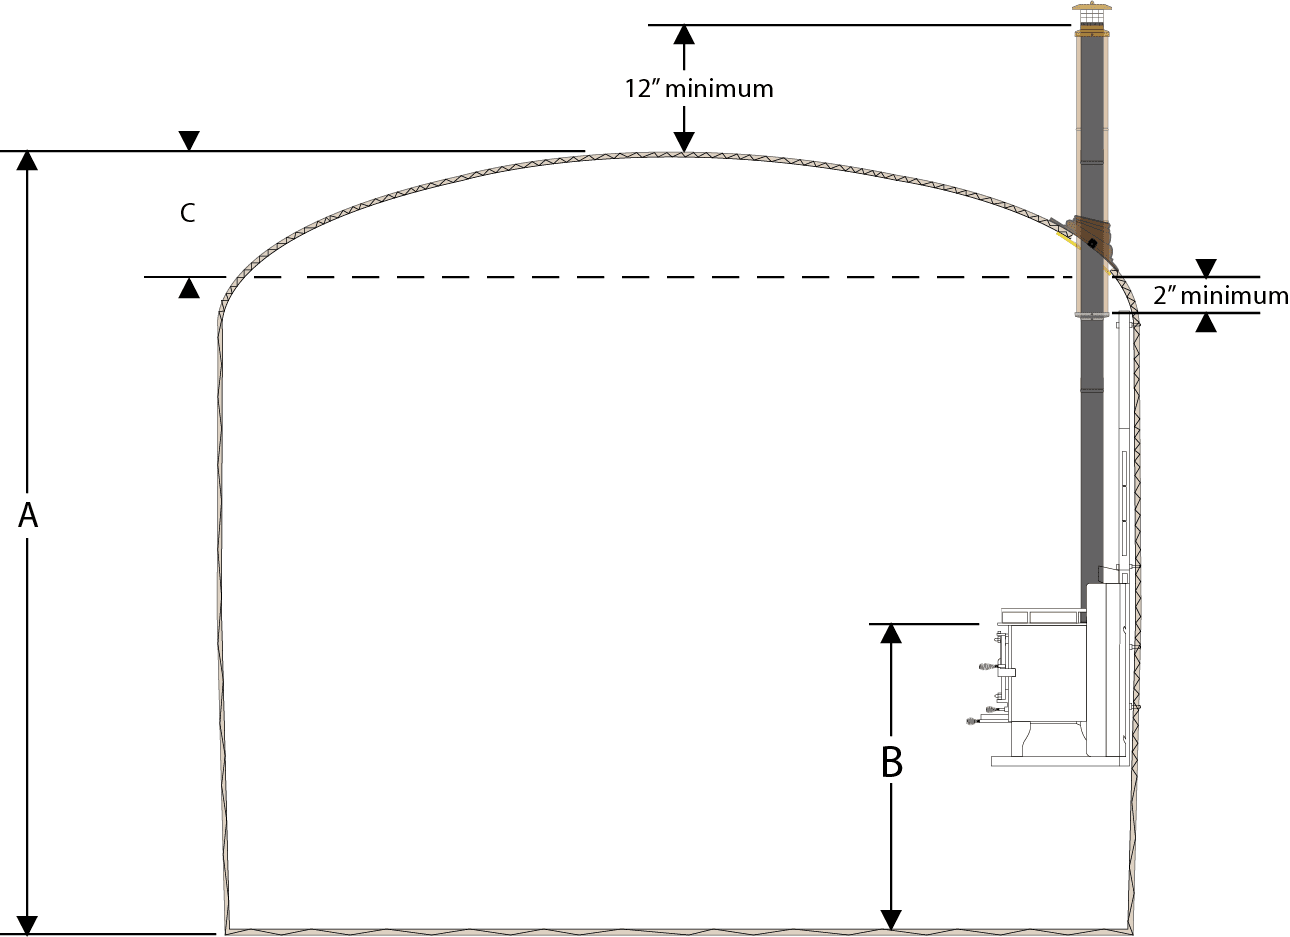
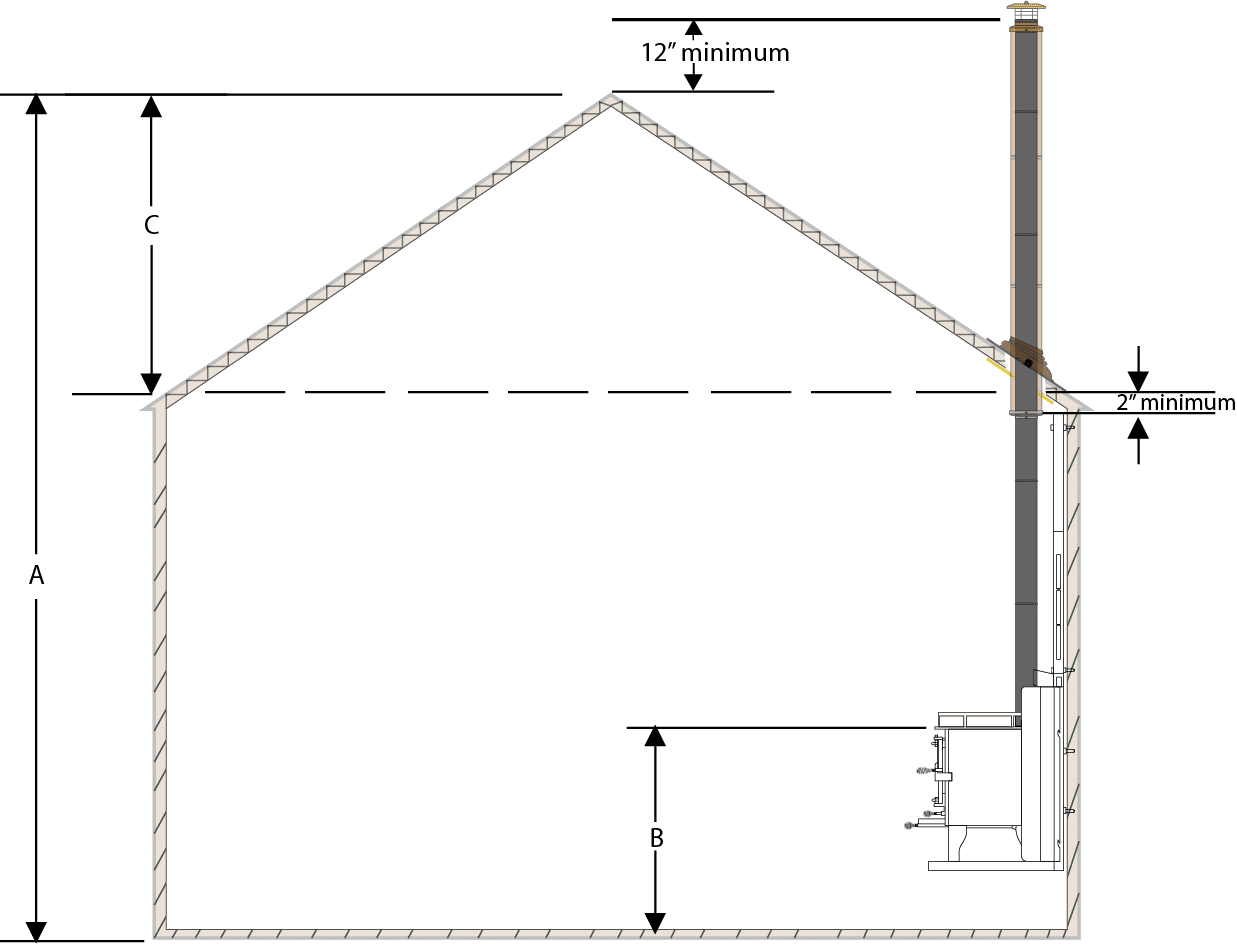
Use this guide to calculate the pipe needed for a complete flue system. Measure all heights vertically, in inches.
MEASUREMENTS
A: Floor to the roof peak or highest point.
B: Floor to the stove’s top plate.
C: Interior ceiling at the pipe opening to the roof peak or highest point, including the roof space and thickness.
USABLE PIPE LENGTHS
3" double wall pipe: a 24" section provides 22.5"; a 12" section provides 10.5". Each connection has a 1.5" overlap.
5" insulated pipe: a 24" section provides 23"; a 12" section provides 11". Each connection has a 1" overlap.
The roof exit kit includes either one 24" insulated section (23" usable) or two 12" insulated sections (22" usable). No 3" pipe is included. For a vehicle that will be driven, choose the two 12" option and add a pipe plug for the lower profile when the stove is not in use.
WORKED EXAMPLE
Roof peak: 120". Interior ceiling: 96". Stove top plate: 36". C = 120 − 96 = 24".
3" pipe: 120 − 36 + 12 = 96". Four 24" sections provide 90", leaving 6". Add one 12" section: 4 × 24" + 1 × 12".
5" pipe: 24 + 10.5 + 2 = 36.5". After the exit kit’s 23" allowance, 13.5" remains, so add one 24" insulated section. With the two 12" kit option, 14.5" remains and the same additional 24" section is needed.
See the diagrams below for flat, rounded and pitched roofs.
Van/Flat Roof
3" Double Wall Flue Pipe
A − B + 12" = required length.
The pipe begins at the stove top plate and ends 12" above the roof peak or highest point.
Divide by 22.5" and take the whole number of 24" sections. For the remaining length, add one 12" section if it is 10.5" or less; otherwise add one more 24" section. If there is no remainder, no extra section is needed.
The pipe begins 2" below the interior ceiling and ends 10.5" above the roof peak, 1.5" below the 3" pipe.
Subtract the pipe included in the exit kit: 23" for one 24" section or 22" for two 12" sections. If the kit covers the required length, no extra insulated pipe is needed.
Divide the additional length by 23" and take the whole number of 24" sections. For the remainder, add one 12" section if it is 11" or less; otherwise add one more 24" section. Never round down below the required length.
Skoolie/Rounded Roof
3" Double Wall Flue Pipe
A − B + 12" = required length.
The pipe begins at the stove top plate and ends 12" above the roof peak or highest point.
Divide by 22.5" and take the whole number of 24" sections. For the remaining length, add one 12" section if it is 10.5" or less; otherwise add one more 24" section. If there is no remainder, no extra section is needed.
The pipe begins 2" below the interior ceiling and ends 10.5" above the roof peak, 1.5" below the 3" pipe.
Subtract the pipe included in the exit kit: 23" for one 24" section or 22" for two 12" sections. If the kit covers the required length, no extra insulated pipe is needed.
Divide the additional length by 23" and take the whole number of 24" sections. For the remainder, add one 12" section if it is 11" or less; otherwise add one more 24" section. Never round down below the required length.
Pitched Roof
3" Double Wall Flue Pipe
A − B + 12" = required length.
The pipe begins at the stove top plate and ends 12" above the roof peak or highest point.
Divide by 22.5" and take the whole number of 24" sections. For the remaining length, add one 12" section if it is 10.5" or less; otherwise add one more 24" section. If there is no remainder, no extra section is needed.
The pipe begins 2" below the interior ceiling and ends 10.5" above the roof peak, 1.5" below the 3" pipe.
Subtract the pipe included in the exit kit: 23" for one 24" section or 22" for two 12" sections. If the kit covers the required length, no extra insulated pipe is needed.
Divide the additional length by 23" and take the whole number of 24" sections. For the remainder, add one 12" section if it is 11" or less; otherwise add one more 24" section. Never round down below the required length.
1 / de3
Differences Between Installation Heights
The pipe begins where the top of the stove is located.
The stove will heat below it. this is just to show the difference
that the installation height has on efficiency.
Amount of 5" Insulated Pipe Needed in relation To The Peak
The closer the pipe exits from the peak the less insulated pipe you will require.
Restez informé avec notre newsletter !
Soyez le premier informé des mises à jour, des actualités et des offres spéciales.
Le choix d'une sélection entraîne l'actualisation de la page entière.